If you’re looking for a quick, flavorful, and satisfying dinner, a garlic butter pan seared pork chops recipe is one of the best choices you can make. This dish features juicy, tender pork chops cooked to perfection with a rich, aromatic garlic butter sauce that elevates the flavor with every bite. Whether you’re cooking for your family on a busy weeknight or impressing guests with a restaurant-quality meal, this recipe delivers gourmet results with simple ingredients and minimal effort. With just a few pantry staples and the right technique, you can create a delicious, golden-brown sear and a succulent interior that makes pork chops a standout dish. Let’s explore how to master this flavorful favorite from start to finish.
What Is a Garlic Butter Pan Seared Pork Chops Recipe?
A garlic butter pan seared pork chops recipe is a classic stovetop method of cooking pork chops by searing them in a hot skillet and finishing them with a luxurious garlic butter sauce. The high-heat sear creates a flavorful crust, while the butter and garlic baste adds moisture and depth. This technique locks in juices and builds layers of taste using just a few quality ingredients.
✅ This method works with both bone-in and boneless pork chops
✅ It’s quick—ready in under 20 minutes
✅ It produces a rich pan sauce that pairs perfectly with sides like mashed potatoes or roasted veggies
The beauty of this recipe lies in its simplicity and versatility. You don’t need fancy tools or exotic ingredients—just a good pan, fresh garlic, butter, and well-seasoned pork chops.
Why This Recipe Is a Weeknight Winner
When dinner time rolls around and you want something delicious without spending hours in the kitchen, this garlic butter pork chop recipe shines. It’s not only fast but also highly satisfying, combining protein, healthy fats, and bold flavors in one pan.
💡 High in protein – Pork chops are a great source of lean protein, helping keep you full and energized.
✅ Customizable – Easily adapt it for keto, low-carb, or dairy-free diets.
⚠️ Avoids dry, tough meat – When cooked properly, these chops stay juicy and tender.
🔥 One-pan meal – Less cleanup, more flavor, and perfect for busy evenings.
Unlike slow-cooked or oven-baked versions, pan-searing gives you that golden, restaurant-style crust in minutes. The garlic butter finish adds a velvety richness that turns a humble cut of meat into something special.
Step-by-Step Guide to Perfect Garlic Butter Pork Chops
Cooking perfect pork chops at home is easier than you think—especially when you follow a clear, reliable process. Here’s how to make delicious garlic butter pan seared pork chops from start to finish.
Step 1: Prepare the Pork Chops
Start by choosing pork chops that are about 1 inch thick. Thicker cuts are less likely to dry out during cooking. Whether you use bone-in or boneless is up to you—bone-in chops tend to be more flavorful and moist due to the bone helping retain heat and juices.
✅ Trim excess fat around the edges to prevent curling
✅ Pat the chops dry with a paper towel—this is key for a good sear
✅ Season both sides generously with salt, pepper, and 1 teaspoon of smoked paprika (optional for a smoky depth)
Let the seasoned chops sit at room temperature for 10–15 minutes before cooking. This helps them cook more evenly.
Step 2: Heat the Pan Properly
Use a heavy-bottomed skillet—cast iron is ideal because it holds and distributes heat evenly. Add 1 tablespoon of olive oil and heat over medium-high heat until the oil shimmers (but doesn’t smoke).
⚠️ Don’t rush this step—cooking in a cold pan leads to gray, steamed meat instead of a golden sear.
Step 3: Sear the Pork Chops
Carefully place the pork chops in the hot pan, leaving space between them to avoid steaming. Sear for 3–4 minutes on the first side, depending on thickness, until a deep golden crust forms.
✅ Don’t move them once they hit the pan—this ensures even browning
✅ Flip only once—use tongs to turn them to the other side
✅ Sear for another 3–4 minutes, or until the internal temperature is close to 140°F
For thinner chops (under ¾ inch), reduce searing time to 2–3 minutes per side.
Step 4: Add Garlic Butter and Baste
Once the chops are nearly done, reduce the heat to medium. Add 2 tablespoons of unsalted butter to the pan. Once melted, stir in 3 cloves of minced garlic.
💡 Use fresh garlic for the best flavor—pre-minced or jarred garlic can taste flat or bitter
✅ Baste the chops by spooning the hot garlic butter over them for 1–2 minutes
✅ This adds flavor and helps finish cooking gently without over-drying
For extra richness, you can add a sprig of fresh thyme or rosemary while basting.
Step 5: Check Temperature and Rest
Use a meat thermometer to check the internal temperature. Pork is safe to eat at 145°F, which allows for a slight pink center and maximum juiciness.
✅ Remove the chops from the pan when they reach 140–142°F—the temperature will rise during resting
⚠️ Let them rest for 5 minutes before serving—this keeps the juices inside instead of spilling out on the plate
Cover loosely with foil to keep warm while you prepare sides.
Tips, and Common Mistakes to Avoid
Even simple recipes can go wrong without the right know-how. Here’s how to get it right every time.
✅ Use a meat thermometer – Guessing doneness leads to dry pork. 145°F is the USDA-recommended safe temperature.
⚠️ Don’t overcrowd the pan – This lowers the temperature and causes steaming instead of searing. Cook in batches if needed.
💡 Let the meat rest – Skipping this step results in dry chops. Resting allows juices to reabsorb.
✅ Adjust heat when adding butter – High heat burns butter and garlic. Reduce to medium or medium-low.
⚠️ Avoid frozen chops – If using frozen, thaw completely and pat dry first to prevent splattering and uneven cooking.
Another pro tip: if your garlic starts to brown too quickly, remove the chops early and finish basting off the heat.
How Thickness Affects Cooking Time
To help you cook pork chops perfectly every time, here’s a quick reference table based on thickness and cooking method:
| ¾ inch (thin) | 2–3 minutes | 6–8 minutes | 140°F (remove early) |
| 1 inch (standard) | 3–4 minutes | 8–10 minutes | 140–142°F |
| 1.5 inches (thick) | 4–5 minutes | 10–12 minutes | 140–142°F |
| Bone-in (1 inch) | 4 minutes per side | 10–12 minutes | 140–142°F |
Note: Always use a meat thermometer for accuracy. Carryover cooking adds 3–5°F during resting.
What to Serve With Garlic Butter Pork Chops
The rich, buttery flavor of these pork chops pairs beautifully with a variety of side dishes. Choose one or two to create a balanced, satisfying meal.
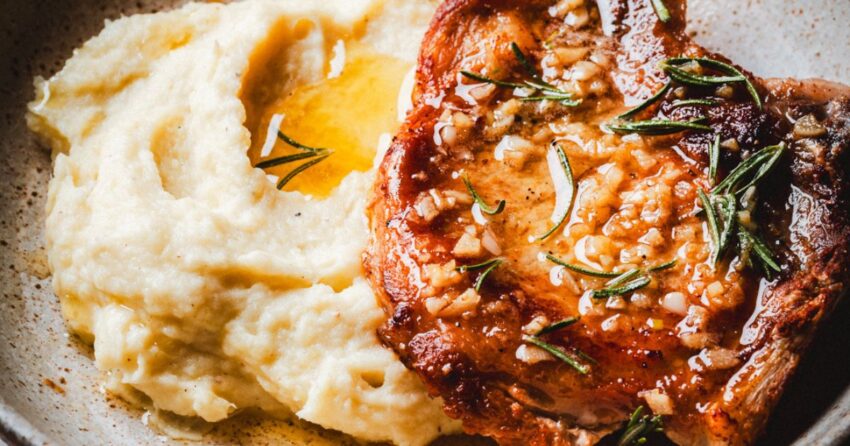
🥗 Garlic Mashed Potatoes – Creamy and comforting, they soak up the garlic butter sauce perfectly.
🥦 Roasted Vegetables – Asparagus, Brussels sprouts, or carrots add color and nutrition.
🥬 Creamed Spinach – A rich, elegant side that complements the pork’s flavor.
🥗 Simple Green Salad – A light vinaigrette cuts through the richness for a refreshing contrast.
🥔 Cheesy Hash Brown Casserole – A hearty favorite that’s great for family dinners.
Many readers have enjoyed this dish with a cheesy potato bake or a crisp garden salad—both are easy to prep while the pork cooks.
Final Thoughts
A garlic butter pan seared pork chops recipe is a go-to meal for anyone who loves bold flavors and quick cleanup. With just a few ingredients and the right technique, you can turn simple pork chops into a restaurant-worthy dinner. The golden sear, juicy interior, and fragrant garlic butter sauce make this dish a family favorite.
💡 Ready to try it tonight? Grab your skillet and follow the steps above for foolproof results.
📢 Love this recipe? Share it with a friend or leave a comment below—we’d love to hear how it turned out!
Frequently Asked Questions (FAQs)
Can I use frozen pork chops for this recipe?
Yes, but only if they’re fully thawed and dried before cooking. Frozen chops release water, which prevents proper searing and can lead to uneven texture.
How do I store and reheat leftovers?
Store cooled pork chops in an airtight container in the fridge for up to 3 days. Reheat gently in a skillet over low heat with a small amount of butter to retain moisture and flavor.
Can I make this recipe dairy-free?
Absolutely! Replace butter with a plant-based alternative like vegan butter or use extra olive oil. The garlic flavor will still shine through.