These Recipes Will Make You Unfollow All Other Food Blogs

1. Slow-Cooker Brisket

Let’s be real for a sec: slow-cooker brisket is the ultimate comfort food. It's the kind of meal that makes you want to throw on some sweatpants, cue up a Netflix show, and just let the magic happen. No stress, no standing over a hot grill for hours. Just meat, time, and maybe a little patience.

I mean, who doesn’t love coming home to a house that smells like heaven and a pot full of tender, juicy brisket? Exactly. That’s what I thought.

So, if you’ve ever wondered how to nail this classic dish without breaking a sweat (pun intended), you’re in the right place. I’ve been cooking brisket in my slow cooker for years now—yes, years—and I’ve learned a thing or two along the way. Some of it the hard way :/ Let’s just say, not every attempt was a winner.

But don’t worry—I’ll walk you through everything so your next slow-cooked brisket turns out perfect, every time.

Why Slow-Cooker Brisket Works Like a Charm


Alright, let’s get into the nitty-gritty. Why is using a slow cooker such a game-changer for brisket?

Well, first off, brisket is a tough cut of meat. Like, really tough. If you try to rush it, you’re gonna end up with something that chews like a boot. Yuck.

But here’s the thing: slow cookers are basically magic boxes. They use low, steady heat over a long period of time to break down those tough fibers and turn them into buttery, fall-apart deliciousness.

Low and slow = tender, juicy, flavorful meat. That’s the golden rule.

And honestly, there’s something super satisfying about setting everything up in the morning and forgetting about it until dinner. It’s like meal prep, but way more rewarding.

What You’ll Need


Before we dive into the how-to, let’s talk gear and ingredients. Don’t worry—it’s not rocket science.

Ingredients:


  • 3–4 lbs beef brisket (fat side up, please!)
  • 1 cup beef broth or stock
  • 1 onion, sliced
  • 4 garlic cloves, minced
  • 2 tbsp Worcestershire sauce
  • 1 tsp smoked paprika
  • 1 tsp garlic powder
  • Salt and pepper to taste
  • Optional: brown sugar, BBQ sauce, or whatever floats your boat

Tools:


  • A decent-sized slow cooker (6-quart works great)
  • Tongs (for handling hot meat)
  • Meat thermometer (because guessing is for amateurs)

FYI, I personally love using a fatty brisket because the fat renders down and keeps everything moist. Lean cuts? Meh. Dry as a bone unless you’re a pro.

Step-by-Step Instructions


Okay, enough chit-chat—let’s cook this thing already!

Step 1: Prep the Meat


First things first: season that bad boy. Pat your brisket dry with paper towels—this helps with browning later. Then rub it generously with salt, pepper, paprika, and garlic powder.

Pro tip: Let it sit at room temperature for about 30 minutes before cooking. This helps it cook more evenly. Trust me, it matters.

Step 2: Layer It Up


Toss those sliced onions and minced garlic into the bottom of your slow cooker. Pour in the beef broth and Worcestershire sauce. Give it a quick stir so all the flavors mingle.

Now, gently place your seasoned brisket on top, fat side up. This lets the fat render and baste the meat as it cooks.

Step 3: Set It and Forget It


Cover that sucker and set your slow cooker to low heat. Walk away. Do something fun. Watch a movie. Live your life.

You’re gonna want to let it cook for 8–10 hours. Yes, it’s a commitment, but it’s worth every second. If you’re in a hurry, high heat for 5–6 hours works too—but IMO, low and slow wins every time.

Pro Tips for Next-Level Brisket


Okay, so you’ve got the basics down. But here’s where you go from “meh” to “man, this is restaurant-quality.”

Tip #1: Don’t Peek Too Early


I know, I know. The smell is intoxicating. But resist the urge to lift that lid. Every time you open it, you lose heat and steam, which can mess with your cook time and texture.

Just trust the process. I promise it’s still there.

Tip #2: Skim the Fat (If You Want)


Once it’s done cooking, you’ll notice a layer of fat on top of the juices. If you’re not into that, skim it off with a spoon. If you are into that… well, more power to ya.

Tip #3: Slice Against the Grain


This is non-negotiable. Slice your brisket against the grain, or you’re gonna end up with chewy strips that’ll make you question all your life choices.

Not sure which way the grain runs? Look closely at the meat—it’s easier than you think.

What to Serve With Slow-Cooker Brisket


So you’ve got this gorgeous, tender brisket. Now what?

Honestly, it pairs with just about everything. Here are some of my go-to sides:

  • Mashed potatoes (duh)
  • Coleslaw (adds a nice crunch)
  • Cornbread (because carbs are life)
  • Baked beans (classic combo)
  • Pickles or pickled onions (for that tangy kick)

And if you're feeling fancy, drizzle some of that cooking liquid over the top for extra flavor. Or mix it with BBQ sauce for a sweeter twist.

Common Mistakes (and How to Avoid Them)


Let’s keep it real: nobody’s perfect. But avoiding these common brisket blunders will save you a lot of heartbreak.

Mistake #1: Rushing the Process


Like I said earlier, brisket is not a quick meal. If you try to speed it up, you’ll end up with tough, dry meat. Just don’t do it.

Mistake #2: Skipping the Seasoning


A naked brisket is like a song without lyrics. Sure, it exists, but... why?

Season well and early. Your taste buds will thank you.

Mistake #3: Cutting It Too Soon


Once the brisket is done, let it rest for at least 10–15 minutes before slicing. This lets the juices redistribute, so every bite is juicy and flavorful.

Final Thoughts


Alright, my friend, you’re now officially equipped to tackle the world of slow-cooker brisket like a total pro. Whether you’re cooking for a crowd or just treating yourself, this method delivers consistent, delicious results—no grill required.

So go ahead, grab that brisket, fire up that slow cooker, and get ready to impress everyone (including yourself). And hey, if it turns out slightly less than perfect? That’s what hot sauce is for :)

Got any brisket stories or tips of your own? Drop ‘em in the comments—I’d love to hear from fellow slow-cooker warriors. Happy cooking!

2. American Banana Split

When you think of over-the-top desserts, what comes to mind? Is it a slice of cake? A towering sundae? Or is it the dessert that literally screams “look at me, I’m ridiculous and I know it”? Yup, we’re talking about the American banana split—a glorious mess of flavors, textures, and pure indulgence. And no, it's not just for kids or summer carnivals. This bad boy deserves a spot on your radar, and here’s why.

So, what’s the deal with the American banana split anyway? Well, grab a spoon (and maybe a bib), because we’re diving deep into this iconic treat—where it came from, why it’s still awesome, and how to make one that’ll make your Instagram followers drool.

What Exactly Is a Banana Split?


Okay, let’s get the basics out of the way. A banana split is a dessert that usually includes a banana cut lengthwise and served in a long dish (the classic banana boat), then topped with scoops of ice cream and a whole mess of toppings. Think whipped cream, cherries, nuts, syrups, marshmallows, sprinkles, and sometimes even more bananas. It’s like a sundae’s wild, fun cousin who showed up to the party with a suitcase full of toppings.

Fun fact: The banana split was probably invented in the early 1900s—some say in Pennsylvania, others in Ohio. Either way, it’s been making mouths happy for over a century. And honestly? It’s aged like a fine wine. Or at least like a really good ice cream.

Why the Banana Split Still Rules


You might be thinking, “Really? In this day and age of cronuts and cloud bread, we’re still talking about a banana split?” Yes, friend. Yes, we are.

Here’s the thing—the banana split is customizable, nostalgic, and totally Instagram-worthy. Plus, it hits that sweet spot (pun intended) between fun and filling. It’s like dessert and a snack had a beautiful, chaotic baby.

Let me tell you, the first time I tried a real-deal banana split at a roadside diner in Ohio (shoutout to the Whistle Stop Café—RIP), I felt like I’d discovered a new food group. The way the strawberry syrup dripped down the side, the way the whipped cream practically begged to be licked off… it was magic. And no, I wasn’t 12. I was a fully grown adult with a questionable life decision and a massive sweet tooth.

The Anatomy of a Classic American Banana Split


So what goes into making a legit banana split? Glad you asked. Here’s the breakdown of what you’ll typically find in a classic version:

The Essentials:


  • One banana (duh)—split down the middle and laid out like it’s sunbathing
  • Three scoops of ice cream: usually vanilla, strawberry, and chocolate
  • Toppings: hot fudge, strawberry sauce, pineapple, whipped cream, maraschino cherries, chopped nuts, sprinkles

The Extras (because why not?):


  • Marshmallows
  • Crushed cookies or wafers
  • Caramel sauce
  • Mini meringues
  • Chocolate shavings

FYI, the key to a great banana split isn’t just throwing stuff on top—it’s about balance. You want every bite to be a little chaotic, but in a good way. Like a food explosion that doesn’t judge you for eating it at 10 PM.

How to Make Your Own Banana Split at Home


Okay, so you’re thinking, “This sounds amazing, but I don’t live next to an old-school soda fountain.” No problem. Making your own banana split is easier than convincing yourself not to eat it.

Here’s a quick DIY guide:

Ingredients:


  • 1 ripe banana
  • 3 scoops of ice cream (flavors of your choice)
  • Hot fudge
  • Strawberry sauce
  • Whipped cream
  • Maraschino cherries
  • Chopped nuts (peanuts or pecans work great)
  • Sprinkles or other fun toppings

Steps:


  1. Slice the banana in half lengthwise and place it in a banana boat or long dish.
  2. Add your scoops of ice cream—traditionally vanilla, strawberry, and chocolate, but honestly, do you.
  3. Drizzle with hot fudge and strawberry sauce.
  4. Add a generous dollop of whipped cream.
  5. Top with cherries, nuts, and sprinkles.
  6. Serve immediately before it melts into a delicious puddle.

IMO, making your own banana split is part of the fun. You can get creative with flavors, toppings, or even go full unicorn mode with colorful syrups and edible glitter. Why not? Life’s too short for boring desserts.

Where to Find the Best Banana Splits in America


If making your own feels like too much effort (and hey, we get it), there are still places that serve up the real deal. Here are a few spots worth checking out:

1. The Original House of Pies – Los Angeles, CA


A legendary spot that’s been serving banana splits since the 60s. Their version is huge, colorful, and unapologetically old-school.

2. Tom’s Restaurant – NYC


This classic diner is known for its oversized desserts, and the banana split is no exception. Perfect for when you’re feeling extra.

3. The Melting Pot – Multiple Locations


Known for fondue, but their dessert banana splits are next-level. Warm, melty, and dangerously good.

Pro tip: If you’re road-tripping, keep an eye out for diners with neon signs. Those are usually the ones that get it. They know that a banana split isn’t just a dessert—it’s a statement.

Why the Banana Split Deserves a Comeback


Let’s be honest. In a world of avocado toast and oat milk lattes, the banana split can feel a little... extra. But maybe that’s exactly what we need right now. A dessert that doesn’t apologize for being indulgent, nostalgic, and joyful? Sign me up.

Plus, it’s a great group dessert. Sharing a banana split at the table brings people together. It’s like dessert as a team-building exercise. Or therapy. Either way, win-win.

Ever tried making one with friends and ended up with a sticky mess and a bunch of laughs? That’s the magic of the banana split—it’s not just about the taste, it’s about the experience.

Final Thoughts: Go Ahead, Treat Yourself


At the end of the day, the American banana split is more than just a dessert. It’s a slice of Americana, a blast from the past, and a reminder that sometimes, the best things in life are the ones that are a little messy, a little over-the-top, and a lot of fun.

So whether you’re making one at home, hunting down the best spot in town, or just daydreaming about whipped cream and maraschino cherries, remember this: life’s too short for boring desserts. Treat yourself. You’ve earned it

3. Wisconsin Butter-Basted Burgers

Something that’ll make your mouth water and your heart skip a beat: Wisconsin butter-basted burgers. No, I’m not kidding around. These aren’t just your average backyard smash burgers — they’re buttery, golden, and cooked to juicy perfection using a technique that’s as old-school as it gets.

If you’ve never had one, you’re missing out — and honestly, it’s kind of tragic. FYI, this isn’t just another food trend slapping on some fancy name. This is the real deal, and if you’re into juicy, flavorful, slightly charred patties with a glossy sheen of melted butter? Yeah, we’re talking to you.

What Exactly Is a Butter-Basted Burger?


So, what’s the deal with basting a burger in butter? Isn’t that just… melting butter on meat?

Well, kind of — but not really. Butter-basting is a cooking technique where you spoon hot, melted butter (often infused with garlic, herbs, or onions) over the top of a burger as it cooks. It’s like giving your patty a spa treatment, but instead of essential oils, it’s getting rich, savory, umami-packed goodness.

In Wisconsin, this method isn’t just popular — it’s practically a religion. You’ll find it in diners, roadside shacks, and even some high-end joints. The result? A crispy crust on the outside, juicy meat on the inside, and a flavor that makes you forget all about ketchup.

Why Wisconsin Does It Best


Okay, okay — butter-basting isn’t exclusive to Wisconsin. But c’mon, let’s be real. Wisconsin takes everything to the next level. Cheese curds? They invented them. Bratwurst? They perfected it. And butter-basted burgers? They’ve turned it into an art form.

Here’s the thing: Wisconsinites don’t mess around when it comes to flavor. And when you’ve got access to some of the best dairy in the country? You better believe they’re going to use it.

The Secret Sauce (Literally)


The magic behind a Wisconsin butter-basted burger lies in the basting butter itself. It’s not just plain butter. Nope. It’s usually infused with:

  • Garlic – for that punchy, aromatic kick
  • Onions – because life without onions is just sad :/
  • Parsley or chives – for a pop of freshness
  • Sometimes even a splash of Worcestershire sauce or soy sauce for that extra umami bomb

This butter gets melted down in the pan and spooned over the burger patties as they sizzle. It’s like a warm, savory blanket for your meat.

How to Make a Wisconsin Butter-Basted Burger at Home


Alright, so you’re thinking, “This sounds amazing, but I live in Ohio. Am I doomed to burger mediocrity forever?” Not even close. You can absolutely make these bad boys at home — and I’m going to walk you through it.

What You’ll Need


First, let’s get our ingredients in order. Here’s what you’re looking for:

  • Ground beef (80/20 blend works great for juiciness)
  • Butter (unsalted, so you control the salt)
  • Garlic (minced or sliced)
  • Onion (thinly sliced or diced)
  • Fresh parsley or chives
  • Salt and pepper
  • Burger buns (brioche or potato rolls are a nice touch)
  • Optional: cheese (Wisconsin cheddar, duh)

Step-by-Step Cooking Process


  1. Form your patties – Keep ‘em about ¾ inch thick. Don’t press too hard; you want them tender, not hockey pucks.
  2. Heat up a cast iron skillet or griddle over medium-high heat. Add a little oil to prevent sticking.
  3. Season your patties with salt and pepper just before throwing them on the pan. Don’t get too fancy — simplicity is key.
  4. Once the patties are searing, drop a few tablespoons of butter into the pan along with your garlic and onions.
  5. As the butter melts and starts to sizzle, spoon it over the patties continuously. This is the basting part — and trust me, it’s therapeutic.
  6. Flip the burgers once, and keep basting. If you’re adding cheese, slap it on now.
  7. Toast your buns lightly, maybe brush ‘em with a little butter too — why not go all in?
  8. Stack it all up: patty, cheese, a little more of that garlic butter spooned on top, and you’re golden.

Boom. You’ve just made a Wisconsin-style butter-basted burger in your own kitchen. Take a bow.

Why Butter-Basting Is Better Than Just Frying


Let’s be honest — most burger methods are solid. Grilling is great, smashing is fun, and slow-cooking is cozy. But butter-basting brings something special to the table.

It Adds Flavor Without Overcomplicating Things


You don’t need 12 sauces or a five-step dry rub. The butter does the heavy lifting. It infuses the meat with flavor while keeping it juicy. Plus, it creates this beautiful, glossy crust that makes your burger look like it came straight out of a gourmet joint.

It’s All About the Texture


Here’s the kicker: basting gives you a crisp exterior and a juicy, tender interior. You get that satisfying sear without drying out the meat. And if you do it right, you’ll have a little pool of garlic butter at the bottom of the pan — which, IMO, should be drizzled on everything.

Are Butter-Basted Burgers Worth the Hype?


Short answer: Hell yes.

Long answer: If you’re into juicy, flavorful burgers that are cooked with love (and a stick of butter), then yes — this is absolutely worth trying. It’s not just about the butter, either. It’s about the technique, the timing, and the care you put into it.

And let’s be real — when you bite into one of these, with that rich, garlicky butter dripping down your fingers, you’ll understand why Wisconsinites swear by this method.

Final Thoughts: Go Forth and Baste


So there you have it — the lowdown on Wisconsin butter-basted burgers. Whether you’re a burger purist or someone who loves a little extra flair, this method is a game-changer.

Give it a shot at home. Impress your friends. Heck, impress yourself. And next time you’re in Wisconsin? Stop by a local spot and ask for the butter-basted special. You won’t regret it.

And remember: life’s too short for dry burgers. Keep it juicy, keep it buttery, and keep it Wisconsin-style.

TL;DR: Wisconsin butter-basted burgers = juicy, garlicky, butter-kissed perfection. Try making one at home — your taste buds will thank you.

4. Tater Tot Casserole

Tater tots are life. Crispy on the outside, fluffy on the inside, and somehow always perfectly salted? Yes, please. But what if I told you there’s a way to take those golden little nubs of joy and turn them into a full-blown comfort food masterpiece? Enter: Tater Tot Casserole.

This isn’t just some random casserole thrown together because you’re too lazy to cook (not that there’s anything wrong with that). No, this is a legit crowd-pleaser that’s easy to make, budget-friendly, and incredibly satisfying. I mean, who doesn’t love a dish that basically bakes itself and still manages to taste like a warm hug?

If you’ve never tried making a tater tot casserole before, you’re missing out. Trust me, I was once a skeptic too. I thought, “Really? Just throw some tater tots in a pan with other stuff and call it dinner?” But guess what? It works—really well.

So grab your apron (or don’t, honestly, no judgment here), and let’s break down why this dish is an absolute game-changer.

Why Tater Tot Casserole Deserves a Spot in Your Life


Okay, let’s get into the good stuff. Why should you care about tater tot casserole? For starters, it’s versatile. You can make it with ground beef, chicken, sausage, or even go full vegetarian. You can load it with cheese, veggies, or just keep it simple.

It’s also super forgiving. Forgot to defrost something? No biggie. Ran out of one ingredient? Swap it out. This casserole doesn’t care. It just wants to feed you, and feed you well.

Plus, it’s a great way to use up leftovers. Got some cooked ground beef from last night’s tacos? Throw it in. Some cheese that’s about to go bad? Yep, toss that in too. It’s like the Marie Kondo of casseroles—it sparks joy and makes everything better.

The Classic Tater Tot Casserole Recipe (That Everyone Loves)


Let’s talk about the OG version—the one that started it all. This classic tater tot casserole is a three-layer wonder that’s as easy as it is delicious.

Ingredients You’ll Need:


  • 2 lbs ground beef or turkey
  • 1 can cream of mushroom soup (or cream of chicken—your call)
  • 1 small onion, diced
  • 1 bag frozen tater tots
  • 2 cups shredded cheese (cheddar works great)
  • Salt, pepper, garlic powder to taste

How to Make It:


  1. Preheat your oven to 350°F.
  2. Brown your ground beef (or turkey) in a skillet with onions. Drain the fat.
  3. Stir in the soup and seasonings. Let it simmer for a few minutes.
  4. Transfer the meat mixture into a 9x13 baking dish.
  5. Layer the tater tots evenly on top.
  6. Sprinkle with cheese.
  7. Bake for 45–60 minutes, or until the tots are crispy and golden.

Boom. Dinner is served.

IMO, this is the perfect beginner recipe. It’s straightforward, uses pantry staples, and delivers maximum flavor with minimal effort. Plus, it reheats like a dream the next day. FYI, I’ve been known to make a double batch just so I have leftovers. No shame.

Variations That’ll Blow Your Mind


Okay, so you’ve tried the classic version and loved it. Now what? Well, my friend, the tater tot casserole world is your oyster.

Here are a few variations that are totally worth trying:

1. Taco Tater Tot Casserole


  • Swap the ground beef for seasoned taco meat.
  • Add black beans, corn, and a sprinkle of taco seasoning.
  • Top with lettuce, tomatoes, and sour cream after baking.

It’s like a taco and a casserole had a beautiful, cheesy baby.

2. Breakfast Tater Tot Casserole


  • Use breakfast sausage instead of beef.
  • Add scrambled eggs and bacon (because why not?).
  • Top with cheese and bake as usual.

This one’s a brunch game-changer. Seriously, try it at your next Sunday brunch and thank me later.

3. Vegetarian Tater Tot Casserole


  • Skip the meat and go heavy on the veggies—think bell peppers, mushrooms, and zucchini.
  • Use a plant-based soup or just add extra cheese.
  • Add black beans or lentils for protein.

It’s hearty, healthy(ish), and surprisingly filling.

Tips for the Perfect Tater Tot Casserole


Alright, let’s get a little technical for a sec. Making a tater tot casserole is easy, but there are a few tricks to make sure it turns out absolutely perfect.

Don’t Overcrowd the Pan


Make sure your tater tots are evenly spaced. If you pile them on too thick, they won’t crisp up properly. And let’s be honest, nobody wants soggy tots.

Season Everything


Just because it’s a casserole doesn’t mean you can skip the seasoning. Salt, pepper, garlic powder, and onion powder are your best friends here.

Let It Rest


After you pull it out of the oven, let it sit for 10 minutes before serving. This allows the layers to set and makes it way easier to slice.

Go Bold with Cheese


Don’t be shy with the cheese. In fact, go nuts. Cheddar, mozzarella, pepper jack—whatever floats your boat. More cheese = more happiness.

Why This Dish is a Crowd-Pleaser


Let’s be honest—tater tot casserole is a crowd-pleaser for a reason.

First off, it’s incredibly kid-friendly. Even the pickiest of eaters usually can’t resist crispy tots and melty cheese.

Second, it’s perfect for potlucks, family dinners, or game day. You can make it ahead, bake it when you’re ready, and serve it straight from the pan.

And third? It’s just plain comforting. There’s something about the combination of warm meat, creamy soup, and crispy tots that just hits different. It’s like a warm blanket for your soul.

Final Thoughts: Give It a Try Already!


Look, I’m not here to pressure you into cooking, but if you’re looking for a delicious, easy, and versatile dish that’s sure to impress (or at least satisfy), tater tot casserole is the way to go.

Whether you stick to the classic version or get creative with your own twist, this dish is a winner. And hey, worst case scenario, you’ve got a pan of cheesy tater tots. Not the worst outcome, if you ask me.

So go ahead—preheat that oven, grab a bag of tater tots, and give this casserole a shot. Your taste buds (and your family) will thank you.

And if you end up loving it as much as I do? Well, welcome to the club. We’ve got tots.

5. Creamy Macaroni and Cheese

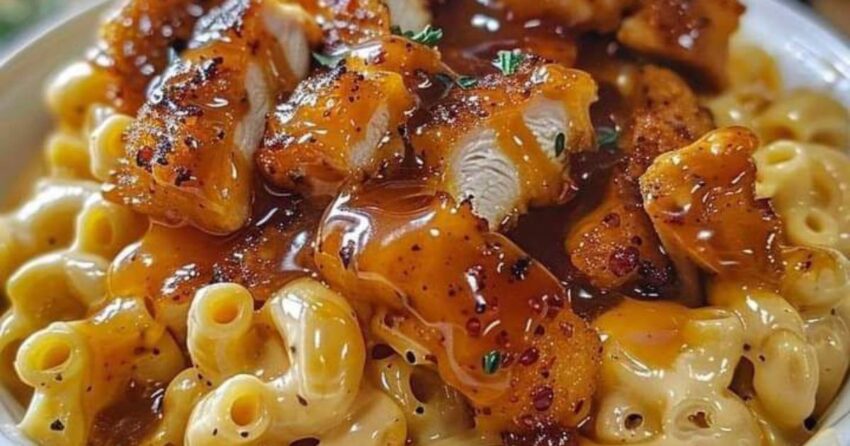
creamy mac and cheese isn’t just a dish. It’s a vibe. A comfort food hug in a bowl. Whether it’s 3 PM on a Tuesday and you’re feeling snacky, or it’s the side dish stealing the show at Sunday dinner, there’s just something about that velvety, cheesy goodness that hits different.

And no, we’re not talking about that neon-orange stuff that comes in a box (we see you, Kraft). We’re diving into the real deal—homemade creamy mac and cheese that’s rich, indulgent, and 10x better than anything you’ve had before. Trust me, I’ve made a lot of mac and cheese. Like, embarrassingly a lot.

So grab a fork (and maybe a napkin), because we’re about to get into the good stuff.

Why Homemade Creamy Mac and Cheese Wins Every Time


Okay, let’s get one thing straight—boxed mac and cheese is fine. It’s convenient, it’s nostalgic, and honestly, sometimes it hits the spot. But homemade? That’s a whole different level.

When you make it from scratch, you’re in control. You get to choose the cheese, the creaminess, and even the texture. Plus, it tastes like actual cheese. Shocking, I know.

Here’s the thing: making creamy mac and cheese from scratch isn’t hard. It just takes a little love, a little butter, and maybe a splash of heavy cream. And yes, it’s totally worth it.

What Makes Mac and Cheese Actually Creamy?


Alright, let’s get nerdy for a sec. What’s the secret to that ultra-creamy texture that makes you close your eyes and just feel the moment?

Well, it all comes down to a few key things:

  • Cheese, cheese, and more cheese – But not just any cheese. We’ll get into that in a sec.
  • A proper cheese sauce – This isn’t just melted cheese. It’s a smooth, dreamy sauce with a roux base (butter + flour) and some milk or cream.
  • Cooking pasta just right – You want it al dente, not mushy. Mushy pasta is a crime in the mac and cheese world.

FYI, don’t skip the roux. I tried that once. It did not go well.

Choosing the Right Cheese (Yes, There’s a Right Way)


Let’s talk cheese. This is where things can go from “meh” to “mind-blown.”

Here’s the lowdown: you want a blend. Using just one cheese is like listening to a song with only one instrument. It’s technically music, but where’s the fun in that?

Here’s my go-to combo:

  • Sharp cheddar – The classic. Adds that tangy, bold flavor.
  • Gruyère – Melts like a dream and adds a nutty richness.
  • Gouda – Smoked or aged works great for a little depth.
  • Parmesan – Just a sprinkle for that umami kick.

IMO, avoid pre-shredded cheese. It’s coated in anti-caking agents that don’t melt well. Go for the block and grate it yourself. Your sauce will thank you.

The Best Pasta Shape for Creamy Mac and Cheese


You might think, “It’s mac and cheese, duh—it’s macaroni.” And while, yes, elbow macaroni is classic, it’s not the only option.

Here are a few shapes that hold sauce like champs:

  • Elbow macaroni – The OG. Great for kids and adults alike.
  • Cavatappi – Spiral shape = more surface area for sauce. Win.
  • Rigatoni – Big, bold, and perfect if you’re feeling extra.
  • Shell pasta – Holds the sauce in the curves. Plus, it looks fancy.

Whatever you choose, just make sure it’s short and sturdy. Long noodles like spaghetti? Hard pass.

How to Make the Creamiest Mac and Cheese Sauce


Let’s break it down, step by step. This is where the magic happens.

Ingredients You’ll Need:


  • 3 tbsp butter
  • 3 tbsp all-purpose flour
  • 2 cups whole milk (or heavy cream for extra richness)
  • 2 cups sharp cheddar, shredded
  • 1 cup Gruyère or Gouda, shredded
  • Salt, pepper, and a pinch of nutmeg (trust me on this one)

Steps:


  1. Melt the butter in a saucepan over medium heat.
  2. Whisk in the flour and cook for a minute or two to make a roux.
  3. Slowly add the milk, whisking constantly to avoid lumps. Keep it low and steady.
  4. Once it starts to thicken, add the cheese, a handful at a time, stirring until smooth.
  5. Season with salt, pepper, and that sneaky pinch of nutmeg.

Boom. Creamy cheese sauce = done.

Tips to Keep Your Mac and Cheese From Going Wrong


Let’s be real—mac and cheese can go sideways fast. Here are a few things to watch out for:

  • Don’t boil the sauce – Keep it on low heat. High heat = curdled cheese.
  • Add pasta water – If the sauce gets too thick, a splash of pasta water brings it back to life.
  • Taste as you go – Salt matters. So does cheese quality. Don’t be shy.
  • Don’t overcook the pasta – Al dente is your friend.

Also, don’t let your cheese sauce sit too long before mixing it with pasta. It’ll thicken up and you’ll be left with a sad, dry mess. Not cute.

Baked vs. Stovetop Mac and Cheese – What’s Better?


Here’s a hot take: both are great, but they serve different vibes.

Stovetop mac and cheese is quick, creamy, and perfect for when you want instant comfort. Think of it like your favorite cozy hoodie—soft, reliable, and ready to go.

Baked mac and cheese, on the other hand, is next-level. You get that golden, crispy top layer with a creamy center. It’s like mac and cheese’s formal outfit.

If you’re feeling fancy, toss it in a baking dish, top with breadcrumbs or more cheese, and bake at 375°F for 20 minutes. You’ll thank me later.

Variations That’ll Make You Forget About the Original


Once you’ve mastered the basics, it’s time to play. Here are a few twists that’ll level up your game:

  • Add bacon – Because everything’s better with bacon.
  • Mix in jalapeños – For a spicy kick.
  • Top with panko breadcrumbs – Adds a satisfying crunch.
  • Stir in truffle oil – Fancy, but so worth it.
  • Go gourmet with lobster – Okay, now you’re flexing.

IMO, the best part about mac and cheese is how customizable it is. You’re not breaking any rules—you’re making your own.

Final Thoughts: Creamy Mac and Cheese is Life


Look, at the end of the day, creamy mac and cheese is more than just dinner. It’s comfort. It’s nostalgia. It’s the kind of dish that makes you slow down and actually enjoy your meal.

Whether you stick to the classic version or go full gourmet, the key is to make it your own. Use your favorite cheeses, experiment with add-ins, and don’t be afraid to tweak the recipe until it’s just right.

So what are you waiting for? Grab that pot, shred that cheese, and get cooking. And hey—don’t forget to save some for the rest of us. :)

TL;DR:

  • Use a blend of cheeses for maximum flavor
  • Don’t skip the roux—it’s the backbone of your sauce
  • Cook pasta al dente and stir in sauce gently
  • Feel free to bake it for that golden crust
  • Most importantly—have fun with it!

Now go make some magic.

6. Golden Apple Pie

Golden apple pie isn’t just a dessert; it’s a vibe. Like, imagine walking into your grandma’s kitchen and catching that buttery, cinnamon-scented whiff of pie baking in the oven. That warm, nostalgic hit? Yeah, that’s what we’re talking about.

So, whether you're already a pie pro or just someone who Googled “how to not burn dessert,” you're in the right place. I’ve made more apple pies than I care to admit (some golden, some... less golden), and today, I’m breaking down everything you need to know to make one that actually turns out perfect.

Let’s get into it.

What Makes a Golden Apple Pie, Well… Golden?


First things first—what exactly are we aiming for here? A golden apple pie isn’t just about looks (though, let’s be honest, we eat with our eyes). It’s about hitting that sweet spot where the crust is flaky, slightly caramelized, and just golden enough to make your Instagram followers jealous.

But here’s the kicker: getting there isn’t just about slapping apples in a crust and hoping for the best. There’s a bit of technique involved, and yeah, maybe a sprinkle of patience (and cinnamon).

So, what’s the secret sauce? Let’s break it down.

The Crust Game: Flaky vs. Floppy


Let’s talk crust. If your crust looks like it lost a fight with a rolling pin, we’ve got work to do.

The key to a golden crust? Butter. Lots of cold butter.

Here’s what I’ve learned the hard way:

  • Use cold ingredients—butter, water, even the bowl. Cold = flaky. Warm = sad.
  • Don’t overwork the dough. You’re not kneading bread; you’re building layers.
  • Blind bake if you’re worried about a soggy bottom. FYI, it’s a game-changer.

And for that golden sheen? Brush the crust with an egg wash (1 egg + 1 tbsp water) before baking. It’s like highlighter for your pie—subtle but effective.

The Filling: Apple-ly Ever After


Now, let’s chat about the filling. Not all apples are created equal, and if you’re using Red Delicious, I’m not mad—I’m just disappointed.

Best apples for baking?

  • Granny Smith – tart, holds its shape
  • Honeycrisp – sweet, juicy, and firm
  • Braeburn – balanced flavor, great texture

Mixing two types is totally fine—and IMO, encouraged.

Also, don’t skip the thickener. Toss those apples with a bit of flour or cornstarch to soak up excess juice. Nobody wants a pie soup, am I right?

And spices! Cinnamon is a must, but a pinch of nutmeg or cardamom can elevate things. Just don’t go full Willy Wonka unless you’re into that.

Baking Tips That Actually Work


Okay, so you’ve got your crust, your apples, and you’re ready to bake. But wait—oven temp matters.

Here’s my golden rule:

  1. Start hot – 425°F for the first 15–20 minutes to set the crust
  2. Then drop it to 375°F to finish cooking through

Why? Because you want that crust to puff up and get golden without burning before the apples are soft.

Also, tent the edges with foil if they’re browning too fast. Your crust doesn’t need a sunburn.

And don’t even get me started on the toothpick test. If it slides in easily, you’re good. If it feels like you’re drilling for oil, give it more time.

Common Mistakes


Let’s be real—we’ve all been there. You pull the pie out of the oven, proud as heck, only to realize it’s either undercooked, overdone, or somehow both.

Here are the usual suspects:

1. Skipping the Pre-Bake


If your crust is soggy, it’s probably because you skipped blind baking. Trust me, it’s worth the extra 10 minutes.

2. Overpacking the Apples


Less is more. Overstuffing = overflow. And nobody wants sticky oven floors.

3. Cutting It Too Soon


Let it cool for at least 2 hours. I know, I know—it’s torture. But it helps the filling set.

Pro Tips You’ll Actually Use


Alright, you’ve made it this far. Time for some next-level pie wisdom.

  • Refrigerate the dough for at least 30 minutes before rolling. It makes everything easier.
  • Use a pie shield or foil ring to protect the edges from over-browning.
  • Add a splash of lemon juice to the apples—it keeps them from browning and adds a nice zing.
  • Cover the pie with a towel while it cools to prevent a skin from forming on the filling.

And if you're feeling fancy, top it with a scoop of vanilla ice cream or a drizzle of salted caramel. Your future self will thank you.

Final Thoughts


So there you have it—a golden apple pie that’s flaky, flavorful, and worthy of a standing ovation. Or at least a solid “mmmm” from your dinner guests.

Sure, it takes a little effort, but isn’t that what makes it special? Whether it’s for Thanksgiving, a cozy Sunday, or just because you’re craving something sweet, this pie delivers.

And hey, if your first attempt isn’t Insta-perfect, don’t sweat it. Even burnt pies have stories. :)

So grab your rolling pin, channel your inner pie artist, and get baking. Your kitchen (and your taste buds) will thank you.

Now go forth and pie responsibly.

7. Pressure-Cooker Philly Cheesesteak Sandwiches

Have you ever tried making a Philly cheesesteak and ended up with a soggy mess instead of that glorious, juicy, melty perfection we all crave? Yeah, I’ve been there. More times than I’d like to admit. But guess what changed my life (and my lunch game)? My pressure cooker. No joke, this thing is a total game-changer for making the ultimate cheesesteak at home, and I’m here to walk you through it.

Why Use a Pressure Cooker for Cheesesteaks?


Let’s be real — the traditional way of making a Philly cheesesteak involves a flattop griddle, a screaming hot kitchen, and probably some questionable ventilation. Not everyone’s got that setup at home (or the patience). That’s where your pressure cooker comes in. It traps steam, builds pressure, and basically turbo-charges the cooking process — all while keeping your meat juicy and your cheese perfectly melted.

Bonus: You don’t even need to step outside or install a commercial exhaust fan in your kitchen. Win-win.

The Magic Behind the Steam


Here’s the deal — when you cook meat under pressure, it retains way more moisture than pan-searing or grilling. So instead of ending up with dry, tough steak, you get tender, juicy slices that practically melt in your mouth. And the best part? The whole thing takes under 30 minutes, from start to sandwich. No more waiting around for delivery or pretending your homemade version is “artisanal” because you forgot the cheese.

What You’ll Need


Before we dive into the how-to, let’s talk gear. You don’t need much, but there are a few essentials.

The Must-Haves:


  • Pressure cooker (duh) — electric or stovetop, your call.
  • Ribeye steak — this is the classic cut. Leaner cuts? Nah, not happening.
  • Cheese — provolone is the OG, but American works too if you're feeling extra-American.
  • Onions — thinly sliced, preferably caramelized (but we’ll shortcut that).
  • Hoagie rolls — soft, fresh, and sturdy enough to hold up to all that juicy goodness.
  • Optional but recommended: bell peppers and mushrooms if you’re feeling fancy.

FYI, if you don’t have a pressure cooker yet, now’s the time to invest. IMO, it’s one of the most versatile tools in the kitchen — and it’s not just for beans and stews. You can literally make anything in one, and I mean anything. But we’re here for cheesesteaks today, so let’s roll.

How to Make Pressure-Cooker Philly Cheesesteak Sandwiches


Alright, let’s get into the nitty-gritty. Don’t worry — this isn’t going to be one of those recipes that makes you want to quit cooking forever. We’re keeping it simple, effective, and delicious.

Step 1: Prep Your Meat


First things first — ribeye steak. You want it frozen for 30 minutes before slicing. This makes it easier to cut thin without it falling apart. Slice it against the grain into thin strips — think paper-thin but not tissue-paper thin. You’re not making carpaccio here.

Once sliced, season lightly with salt and pepper. That’s it. No need for fancy rubs or marinades. Less is more when it comes to cheesesteaks.

Step 2: Pressure Cook the Steak


Heat up your pressure cooker using the sauté function (or heat it on the stovetop if you're old school). Add a little oil — just enough to prevent sticking. Once it’s hot, throw in your steak in a single layer. Don’t overcrowd it, or you’ll end up steaming instead of searing.

Sear for 2-3 minutes, then flip and sear the other side. You’re not cooking it all the way through — just getting some color on it. This is important for flavor.

Once you’ve got that nice brown crust, add about 1/4 cup of beef broth (or water, if you’re feeling lazy). Lock that lid, set it to high pressure for 2 minutes, and walk away. Literally. Go check your phone or something.

Step 3: Quick Release and Prep the Fixings


After the 2 minutes are up, do a quick pressure release. Don’t wait — you want to stop the cooking process so the meat stays tender.

While the pressure releases, throw your onions (and peppers, if using) into the pot. Sauté them for a few minutes until they’re soft and slightly caramelized. Pro tip: If you want to shortcut the caramelization even more, add a pinch of sugar. Your taste buds will thank you.

Step 4: Assemble Like a Pro


Now comes the fun part — assembly. Toast your hoagie rolls lightly so they don’t get soggy. Layer the steak on the bottom half, top with the sautéed onions (and peppers), and melt a generous amount of cheese on top. Provolone is classic, but honestly, if you want to go full American cheese, I won’t judge. :)

Fold it up, press it gently (but don’t smoosh it), and serve immediately. There’s nothing worse than a cold cheesesteak. Trust me on this one.

Tips and Tricks for Cheesesteak Perfection


Okay, so you’ve got the basics down. But if you want to take your pressure-cooker cheesesteak from “meh” to “man, I should’ve made a second one,” here are a few tips.

1. Don’t Skip the Broth


That little bit of liquid? It’s doing more than you think. It creates steam, which helps tenderize the meat under pressure. Plus, it keeps things from drying out. Always add some kind of liquid, even if it’s just water.

2. Get the Right Cheese


Cheese is non-negotiable. Provolone is the gold standard, but if you’re in a pinch, American or even mozzarella can work. Just don’t go full “fancy cheese board” and ruin the vibe. This isn’t a charcuterie platter — it’s a sandwich.

3. Customize to Your Heart’s Content


Like mushrooms? Add ‘em. Hate onions? Skip ‘em. Want to throw some jalapeños on there for a kick? Go for it. The beauty of making your own cheesesteak is that you make the rules. Make it your own.

4. Don’t Forget the Rolls


I can’t stress this enough — use proper hoagie rolls. Soft on the inside, slightly crusty on the outside. If you use hamburger buns, you’re doing it wrong. Just saying.

Why This Method Works Better


Let’s be honest — there are a lot of ways to make a cheesesteak. Pan-frying, grilling, even air-frying. But the pressure cooker method? It’s faster, juicier, and way more consistent.

You don’t have to stand over a hot stove for 20 minutes. You don’t have to worry about overcooking the meat. And you definitely don’t have to deal with uneven heat or dry, chewy steak.

Plus, it’s clean-up friendly. Everything happens in one pot. Hello, easy weeknight dinner.

Final Thoughts: Is It Worth It?


Short answer: Hell yes.

Long answer: If you’re tired of ordering takeout cheesesteaks that are either overpriced or underwhelming, this is your wake-up call. Making your own pressure-cooker Philly cheesesteak is not only easy, it’s way more satisfying. You control the ingredients, the flavor, and the mess. (Okay, there’s still some mess — but way less than grilling.)

So go ahead, grab your pressure cooker, slice that ribeye, and make yourself a sandwich that’ll remind you why you fell in love with cooking in the first place. And if you spill cheese on your shirt? Well, that’s just part of the experience.

Pressure cooker + ribeye + cheese = cheesesteak magic. Try it. You won’t regret it.

8. Easy Key Lime Pie

First things first — what even is a key lime pie? FYI, it’s not just lime pie with a cooler name. Key limes (aka Mexican limes) are smaller, more tart, and pack a seriously bright punch compared to the usual Persian limes you see in the grocery store. But don’t stress — you don’t need to hunt down tiny green orbs to make this magic happen.

Most recipes call for key lime juice, but if you can’t find it, regular lime juice works just fine. Just make sure it’s fresh — none of that bottled nonsense. Your taste buds will thank you.

Why You Should Make Your Own (Spoiler: It’s Cheaper and Tastier)


Okay, let’s talk turkey. Or pie. Or whatever. Making your own key lime pie isn’t just impressive — it’s also way cheaper than buying one from a bakery (unless you’re ballin’ on a fancy dessert budget). Plus, you get to control the sweetness, tartness, and creaminess. Want it extra zingy? Boom. Prefer it a little sweeter? Done.

Bonus: You don’t have to share with anyone unless you want to. (But let’s be honest — you’ll want to brag about it.)

The Magic Ingredients


Alright, let’s get down to the good stuff — what’s actually in this pie? Here’s the short list of ingredients you’ll need:

For the Crust:


  • Graham crackers (about 1½ cups crushed)
  • Butter (melted, ~6 tbsp)
  • A little sugar (2 tbsp or so)

For the Filling:


  • Sweetened condensed milk (one 14 oz can)
  • Key lime juice (½ cup fresh, or regular lime juice)
  • Egg yolks (3–4 should do the trick)

That’s it. No fancy pastry skills, no weird stabilizers, no sous vide nonsense. Just good ol’ pantry magic.

Step-by-Step: How to Make Easy Key Lime Pie


Alright, let’s walk through this like we’re chatting in your kitchen, and I’m guiding you through it. No pressure, no stress — just pie vibes.

Step 1: Prep the Crust


Crush those graham crackers — you can use a food processor or just smash ‘em in a ziplock bag with a rolling pin. (Yes, I’ve done that. No shame.) Mix the crumbs with melted butter and sugar, then press it into a pie dish. Use the back of a spoon or a flat-bottomed glass to get it even.

Pro tip: Don’t overthink it. It doesn’t have to look like Pinterest — just make sure it’s packed in there.

Pop it in the oven at 350°F for about 8–10 minutes until it’s lightly golden. Let it cool while you prep the filling.

Step 2: Whip Up the Filling


This is where the magic happens. In a bowl, whisk together:

  • The sweetened condensed milk
  • The lime juice
  • The egg yolks

Keep whisking until it’s smooth and creamy. You’ll notice it thickens up a bit — that’s totally normal. If it looks like it’s about to curdle, don’t panic. It’ll bake up just fine.

Step 3: Bake It (Sort Of)


Pour the filling into your cooled crust and pop it in the oven at 350°F for about 15 minutes. You want the filling to be just set — not jiggly like Jell-O, but still a little wobbly in the center. Overbaking = rubbery pie. And nobody wants that.

Once it’s out, let it cool to room temp, then refrigerate for at least 3 hours (or overnight). Patience is a virtue, my friend.

Optional But Highly Recommended


Okay, so your pie is done. It’s creamy, dreamy, and ready to serve. But why not make it extra? Here are a few simple ways to level up your easy key lime pie:

  • Whipped cream on top? Yes, please.
  • A little lime zest for that fresh zing.
  • A drizzle of white chocolate if you’re feeling fancy.
  • Or just a dusting of powdered sugar for that “I meant to do that” look.

IMO, the whipped cream is non-negotiable. It balances the tartness and makes every bite feel like a cloud. :)

Troubleshooting: What Could Go Wrong?


Let’s be real — even the best of us hit a snag now and then. Here are a few things that might go sideways, and how to fix ‘em:

My crust fell apart:


Make sure you’re using enough butter — it’s the glue that holds it all together. And don’t skip the pre-baking step!

The filling curdled:


This usually happens if the lime juice is too acidic or you overbeat it. It’s not the end of the world — it’ll still taste amazing. Just whisk it well and bake as usual.

It’s too sweet/too tart:


Next time, adjust the lime juice or condensed milk to your taste. Cooking is all about trial and error — and licking the spoon. :)

FAQs (Because We Know You’re Wondering)


Can I make it ahead of time?
Absolutely! In fact, it tastes even better the next day. Just cover it and keep it chilled.

Can I freeze it?
Sure, but the texture might change a bit. Best eaten fresh.

Do I need key limes, or can I use regular ones?
Regular limes work just fine. Just make sure they’re fresh.

Can I make it without eggs?
You could, but it won’t set the same way. There are vegan versions out there, but this one’s all about that custardy goodness.

Final Thoughts


Look, I’m not here to tell you that making a key lime pie will change your life. But it might make your weekend. Or your holiday dessert lineup. Or just a Tuesday. (Yes, I’ve done that too.)

The bottom line? This easy key lime pie is creamy, dreamy, and totally doable — even if you’ve never baked a thing in your life. With just a handful of ingredients and a little patience, you’ll have a dessert that looks like it came from a five-star bakery. And the best part? You made it. All by yourself. :)

So go ahead, grab those limes, fire up that oven, and get ready to impress everyone (including yourself). Trust me — this one’s a keeper.

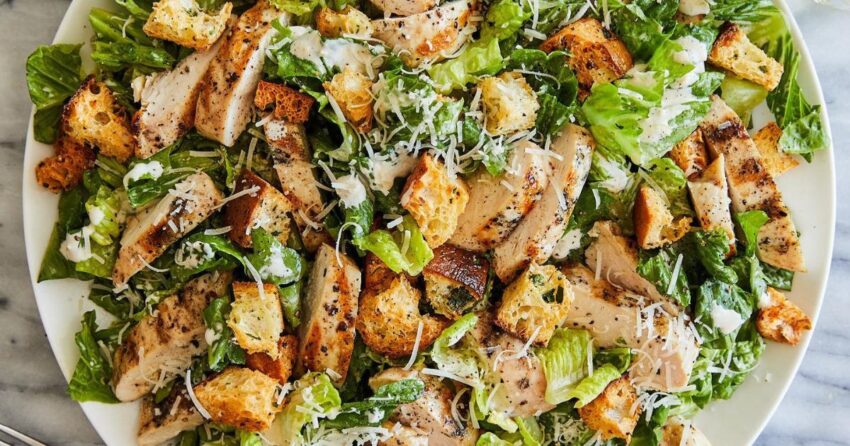
9. Barbecue Pork Cobb Salad

You’re standing in your kitchen, staring at a fridge full of random ingredients, wondering what on earth you can throw together that won’t make you feel guilty afterward. Sound familiar? :) Well, my friend, let me introduce you to your new BFF: the Barbecue Pork Cobb Salad. It’s hearty, it’s healthy(ish), and it tastes like a warm hug from your taste buds. Plus, it’s got that classic Cobb vibe but with a smoky twist that’ll make your tastebuds do a little happy dance.

I stumbled across this combo a few summers ago when I was desperately trying to use up leftover pulled pork from a backyard BBQ. And honestly? It was one of those “why didn’t I think of this sooner?” moments. So grab a fork, and let’s dive into this flavor fiesta.

Why This Salad Rules (Spoiler: It’s Not Just the Pork)


Let’s talk about why the Barbecue Pork Cobb Salad is way more than just a fancy plate of greens.

It’s a Protein Powerhouse


First off, let’s not kid ourselves—this isn’t your average side salad. We’re talking about a full-on meal that’s loaded with lean protein from the pork, which helps keep you full longer. And if you use a low-sugar BBQ sauce? Double win. FYI, I always go for a homemade dry rub on the pork before slow-cooking it—because why let the store-bought stuff have all the fun?

It’s Balanced AF


Here’s the thing about Cobb salads—they’re already stacked with good stuff. Add some smoky, tangy pulled pork into the mix, and boom—you’ve got yourself a perfect balance of textures and flavors:

  • Creamy avocado
  • Crispy bacon (duh)
  • Fresh greens
  • Tangy blue cheese
  • Juicy tomatoes
  • Hard-boiled eggs
  • And yes, that glorious barbecue pork

It’s like the Avengers of salads. Everyone’s got a role, and they all bring something to the table.

What Makes the Barbecue Pork So Special?


Okay, let’s get into the juicy details (pun intended). The pork is the star of the show here, so you better treat it right.

Low and Slow Is the Way to Go


If you’re smoking or slow-cooking your pork, you’re already ahead of the game. I usually go with a pork shoulder because it’s forgiving and gets super tender. Pro tip: rub it down with a mix of paprika, garlic powder, brown sugar, and a little cayenne. Let it sit overnight, then cook it low and slow for about 8 hours. The result? Pulled pork that falls apart like your ex’s excuses after a breakup. :)

Once it’s done, toss it in your favorite barbecue sauce—I’m partial to something with a little kick, but hey, you do you.

Leftovers? Yes Please.


Here’s the best part: this salad is a leftover lover’s dream. Got extra pulled pork from your weekend BBQ? Boom. You’re halfway to dinner. Just throw it on a salad, add your fixings, and you’re golden.

Let’s Talk About the Cobb Part


Alright, so we’ve got the pork down. Now, let’s chat about the Cobb salad base—because it’s not just throwing stuff on a plate and calling it a day.

The Classic Cobb Lineup


A traditional Cobb salad is basically a rainbow of deliciousness, and here’s what you’ll typically find:

  • Romaine lettuce – crisp and refreshing
  • Avocado – creamy and dreamy
  • Bacon – because everything’s better with bacon
  • Hard-boiled eggs – sliced and ready to roll
  • Tomatoes – juicy and vibrant
  • Blue cheese – bold and a little funky (in the best way)
  • Grilled chicken or shrimp – optional, but traditional

But since we’re upgrading to barbecue pork territory, we’re swapping out the chicken for that smoky, saucy goodness. IMO, it’s a total game-changer.

Customization Is Key


Want to switch things up? Go for it. This salad is like a blank canvas. Some folks add corn, others throw in black beans for a Southwestern twist. I once added crumbled tortilla chips and called it a day. It was weird, but also weirdly good. You live, you learn. :)

Dressing: The Unsung Hero


Let’s be honest—a great salad lives or dies by its dressing. And for this beauty, you want something that complements all those bold flavors without overpowering them.

Classic Choices


  • Ranch – the safe bet, and honestly, never a bad idea
  • Blue cheese dressing – if you’re feeling extra fancy
  • Balsamic vinaigrette – for that tangy kick

But here’s a little secret: I sometimes drizzle a little extra barbecue sauce on top. It sounds wild, but trust me, it works. Just don’t go overboard unless you want to start a new food trend. :)

How to Build the Perfect Barbecue Pork Cobb Salad


Alright, let’s get down to business. Building this masterpiece is easier than you think—just follow these steps, and you’ll be good to go.

Step-by-Step Guide


  1. Start with a bed of fresh romaine lettuce – wash it, dry it, and lay it down like you’re making a salad bedspread.
  2. Add your proteins – pile on that barbecue pork and bacon like you’re building a flavor skyscraper.
  3. Layer on the extras – tomatoes, avocado slices, hard-boiled eggs, and crumbled blue cheese.
  4. Drizzle with dressing – just enough to tie it all together. Don’t drown it, unless you’re feeling dramatic.
  5. Serve immediately – nobody likes a soggy salad, unless it’s intentionally soggy, which this is not.

Pro tip: Arrange everything in neat rows so it looks like you actually know what you’re doing. Bonus points if you can make it look like it belongs in a food magazine. :)

Why You Should Make This ASAP


Still on the fence? Let me hit you with a few more reasons why this salad deserves a permanent spot in your meal rotation.

It’s Super Versatile


Whether you’re meal prepping for the week or just trying to impress a date, this salad adapts. Want it lighter? Skip the bacon. Need more carbs? Throw some grilled corn on there. It’s your world—we’re just living in it.

It’s a Crowd-Pleaser


Hosting a BBQ or just having friends over? Whip up a big batch of this, and you’ll be the hero of the night. People love the combo of smoky pork and fresh, crisp ingredients. It’s like a party in a bowl.

It’s Actually Kinda Healthy


Okay, okay—I know what you’re thinking. “But bacon?” Yes, bacon. But if you use lean pork, skip the heavy dressing, and pile on the greens, this salad can actually be a guilt-free(ish) meal. Balance, people. It’s all about balance.

Final Thoughts: You Need This Salad in Your Life


So there you have it—the Barbecue Pork Cobb Salad is equal parts comfort food and healthy(ish) indulgence. It’s got layers of flavor, a satisfying crunch, and enough protein to keep you going strong. Plus, it’s super easy to make once you get the hang of it.

Next time you’ve got leftover pulled pork sitting in your fridge, don’t just reheat it. Level it up. Toss it on a salad, add your favorite fixings, and enjoy a meal that’s both satisfying and Instagram-worthy. :)

And hey, if you mess it up the first time—don’t sweat it. Like my grandma used to say, “The best meals come from the messiest kitchens.” Or something like that. Either way, give it a shot. You won’t regret it.

10. Sticky Honey Chicken Wings

when was the last time you had a plate of chicken wings that actually made you stop mid-conversation and say, “Holy crap, where have you been all my life?” If your answer is “never,” well… we’ve got some work to do. And if your answer is “literally last night,” then buddy, I want to know your secrets.

But today, we’re talking about the kind of wings that hit that perfect sweet-salty balance—sticky honey chicken wings. You know the ones. The kind that leave a glossy sheen on your fingers and a satisfied sigh on your face. These aren’t your average buffalo wings. No sir. These are the kind of wings that make you want to lick the plate clean (no shame in that, IMO). So grab a napkin, and let’s get into it.

What Makes Sticky Honey Chicken Wings So Irresistible?


Okay, so why are we even here? What’s the deal with these wings that make them so dang addictive?

Well, let’s break it down:

  • Sweetness meets savoriness: The honey adds that rich, caramelized sweetness that balances the savory, umami-packed chicken.
  • Sticky texture: That glossy, slightly charred exterior that clings to your fingers? That’s the signature move. It’s what separates the pros from the amateurs.
  • Versatility: These wings are a crowd-pleaser. Whether it’s game night, a backyard BBQ, or just a Tuesday because you’re extra, these wings fit the vibe.

And FYI, the magic isn’t just in the sauce—it’s in the technique. More on that in a sec.

The Perfect Sticky Honey Glaze


So, what exactly goes into that glossy, drool-worthy sauce? Let’s geek out for a minute.

Here’s what I usually throw into my honey glaze:

  • Honey (duh)—the star of the show. Use raw honey if you’re feeling fancy, but regular is totally fine.
  • Soy sauce—for that salty, umami kick.
  • Garlic and ginger—because life’s too short for bland wings.
  • Rice vinegar or lemon juice—to brighten things up and keep it from being too cloying.
  • A splash of hot sauce or chili flakes—optional, but a little heat never hurt anyone. Unless you’re a baby. Then maybe skip it.

Pro tip: simmer the sauce until it’s thick enough to coat the back of a spoon. This is where the magic happens, people.

The Chicken: Crispy Skin is Non-Negotiable


Let’s talk chicken for a sec. Not just any wings will do here. You want that crispy skin situation, or else you’re just eating saucy sadness.

Here’s how I roll:

  1. Pat those wings dry—this is key. Wet skin = soggy disaster.
  2. Season generously—salt, pepper, and maybe a little paprika for color.
  3. Bake or fry? IMO, baking is easier and less messy, but frying gives you that extra crunch. You do you.
  4. Toss in sauce post-cook—slap that glaze on once the wings are cooked. This keeps the skin crispy and the sauce sticky.

And no, you don’t need a deep fryer. A cast iron skillet works just fine if you’re going the fry route.

Baking vs. Frying: Which is Better?


Ah yes, the age-old debate. Let’s settle this once and for all.

Baking:

  • Pros: Less oil, easier cleanup, evenly cooked wings.
  • Cons: Slightly less crispy skin (but still dang good).

Frying:

  • Pros: Super crispy, restaurant-quality crunch.
  • Cons: More oil, more mess, and you better watch that temp.

IMO, if you’re feeding a crowd or doing a big batch, baking is the way to go. But if you’re going for that “I just flew these in from Nashville” vibe, fry away.

Tips for the Sticky Honey Chicken Wings


Alright, let’s get into the nitty-gritty. Here are a few tips I’ve picked up along the way that’ll take your wings from “meh” to “OMG, can I marry these?”

  • Don’t drown the wings in sauce—toss them gently. You want a glossy coat, not a honey bath.
  • Add sesame seeds or chopped scallions for garnish—a little texture and color never hurt anyone.
  • Serve with something cooling—ranch, blue cheese, or even a simple cucumber salad. Balance is key.
  • Make extra sauce—you’ll want to drizzle it on everything. Trust me.

And if you’re feeling extra fancy, try adding a splash of bourbon or bourbon glaze to the sauce. It sounds wild, but it works.

Serving Suggestions That’ll Make You a Hero


Okay, so you’ve nailed the wings. Now what?

Here’s how to serve them like a pro:

  • On a platter with toothpicks—makes it easy to grab and go.
  • With sides that don’t compete—think coleslaw, cornbread, or loaded fries.
  • Drizzle extra sauce on top—for that “I meant to do that” aesthetic.

And don’t forget the drinks. Beer, iced tea, or even a glass of bubbly works. Wings are fancy now, apparently.

Why These Wings Deserve a Spot in Your Recipe Rotation


Let’s be honest—life’s too short for boring meals. Sticky honey chicken wings are the kind of dish that brings people together. Whether it’s a last-minute dinner, a game day snack, or just a way to treat yourself, these wings are solid gold.

They’re:

  • Easy to make (once you get the hang of it)
  • Crowd-pleasing AF
  • Versatile and customizable
  • Way better than anything you’ll get at a chain restaurant

Plus, you get bragging rights. And who doesn’t love that?

Final Thoughts:


Sticky honey chicken wings are the perfect blend of sweet, savory, and satisfying. They’re not just food—they’re an experience. And whether you’re a seasoned cook or someone who still Googles “how to tell if chicken is done,” these wings are totally doable.

So next time you’re craving something a little more exciting than your usual takeout, give these a shot. Your taste buds (and your guests) will thank you.

And hey, if you mess up? Well, that’s what TikTok videos are for :)

Now go forth, and may your wings be crispy, your sauce be sticky, and your napkins be plentiful.

11. California Tamale Pie

I first stumbled on this dish at a friend’s house in Sacramento a few Thanksgivings ago. I was expecting turkey. What I got was a bubbling skillet of cheesy, cornbread-topped tamale magic. And honestly? I didn’t miss the bird one bit. So if you're ready to ditch the turkey drama and embrace something a little more chill (and delicious), keep reading. This one’s for the comfort food lovers—and anyone who thinks casseroles are underrated. :)

What Exactly Is California Tamale Pie?


Okay, so here’s the lowdown: California Tamale Pie is basically a one-skillet wonder that combines all the best parts of a tamale—corn masa, seasoned meat, beans, cheese—into one easy-to-make, crowd-pleasing dish. No steaming, no husks, just pure, cheesy, cornbread-topped bliss.

It’s like a cross between a shepherd’s pie and a tamale, with a side of “why didn’t I think of this sooner?” It usually starts with a base of seasoned ground beef or pork (sometimes chicken), beans, and salsa or green chiles. Then, you top it with a layer of cornbread batter and bake it until golden. The result? A crispy top, creamy middle, and layers of flavor that make you forget you ever bought frozen tamales.

And FYI, it’s super adaptable. Vegetarian? Swap the meat for extra beans or mushrooms. Want it spicier? Go wild with jalapeños or hot sauce. Short on time? Use rotisserie chicken and pre-made salsa. This dish is low-key genius.

Why You Should Give It a Shot (Spoiler: It’s Not Just for Californians)


1. It’s Ridiculously Easy to Make


Let’s be honest—most tamale recipes are commitment level 100. You’ve got to prep masa, wrap everything, steam for hours, and pray it doesn’t fall apart. But California Tamale Pie? You can throw it together in about 30 minutes and bake it while you catch up on your texts. It’s the kind of dish that makes you look like a kitchen wizard without actually having to be one.

2. It’s a Crowd-Pleaser (Even If They Don’t Know It Yet)


Hosting a potluck or feeding a bunch of hungry mouths? This is your secret weapon. It’s filling, flavorful, and looks way more impressive than it actually is. Plus, you can prep it ahead and just pop it in the oven when guests arrive. No stress, no last-minute scrambling. Just golden, cheesy goodness.

3. It’s Super Versatile


Like I said, you can switch it up however you want. Here are some of my favorite twists:

  • Add corn kernels for extra sweetness
  • Mix in black beans or pinto beans for protein
  • Use chicken, ground turkey, or even lentils for a meatless version
  • Top with avocado, sour cream, or cilantro after baking for a fresh finish

It’s basically a blank canvas that says, “Make me your own.”

How to Make the Best California Tamale Pie (IMO)


Alright, let’s get into the good stuff. Here’s how to make a tamale pie that’ll have people asking for seconds—and the recipe.

Ingredients You’ll Need:


For the Filling:

  • 1 lb ground beef or pork (or chicken/lentils)
  • 1 can (15 oz) black beans, drained and rinsed
  • 1 can (15 oz) corn kernels, drained
  • 1 can (10 oz) mild green chiles
  • 1 can (15 oz) diced tomatoes (or salsa if you're feeling fancy)
  • 1 packet taco seasoning (or make your own blend with chili powder, cumin, garlic powder)
  • Salt and pepper to taste

For the Cornbread Topping:

  • 1 box cornbread mix (or homemade if you’re extra)
  • 1 egg
  • 1/3 cup milk
  • 1/4 cup melted butter

Step-by-Step Instructions:


  1. Preheat your oven to 375°F and grab a 10-inch oven-safe skillet (cast iron works great).
  2. In a large skillet, brown the meat over medium heat. Drain the fat if needed.
  3. Stir in the beans, corn, green chiles, and salsa (or tomatoes). Add taco seasoning and simmer for 5–10 minutes until everything’s heated through and flavors are mingling.
  4. Transfer the mixture to your oven-safe skillet and spread it out evenly.
  5. In a bowl, mix the cornbread ingredients (dry mix, egg, milk, and butter) until just combined. Pour it over the filling.
  6. Bake for 25–30 minutes, or until the cornbread topping is golden brown and a toothpick comes out clean.

Boom. Dinner is served. :)

Pro Tips for Tamale Pie Perfection


  • Season the filling well. This is your flavor base, so don’t skimp on the spices. A little cumin and chili powder go a long way.
  • Don’t overmix the cornbread. Lumps are fine—overmixing leads to dense, sad cornbread. You want light and fluffy.
  • Let it rest for 5–10 minutes after baking. This helps the layers set and makes it easier to slice.
  • Top it off with shredded cheese, avocado, or sour cream right before serving for that extra wow factor.

And trust me, this tastes even better the next day, so don’t be shy about making it ahead. It’s like a leftover gift to your future self.

Is It Healthy? Let’s Be Real.


Is it salad? No. Is it delicious and satisfying? Absolutely. If you’re looking to make it a bit lighter, here are a few easy swaps:

  • Use lean ground turkey or plant-based meat
  • Add extra veggies like bell peppers or zucchini to the filling
  • Choose low-sodium beans and salsa
  • Make a whole-grain cornbread topping if you’re feeling extra virtuous

But let’s be real—it’s comfort food. It’s not supposed to be kale. It’s supposed to make you happy. And IMO, that’s worth a few extra calories. :)

Final Thoughts: Give It a Try—You’ll Be Glad You Did


Look, if you’re tired of the same old casseroles and want to spice up your comfort food game, California Tamale Pie is where it’s at. It’s easy, satisfying, and full of flavor without being overly complicated. Whether you’re cooking for a crowd or just trying to make weeknight dinner a little more exciting, this dish delivers.

So go ahead—grab that skillet, fire up the oven, and give it a shot. And hey, if you mess it up? No biggie. Even a slightly burnt tamale pie is better than most takeout. ;)

And if you try it, let me know how it goes. I’d love to hear your twists on it. Who knows—maybe we’ll start a tamale pie revolution. :)